If you skipped the last few steps and are using a character from the basic character tutorial you will need to follow on from here.
Now for the bit you have been waiting for, we will make our character or cube shoot.
This is easiest method of shooting as it can be more complex and controllable but if you need a quick shooting object to test with, then this is your route.
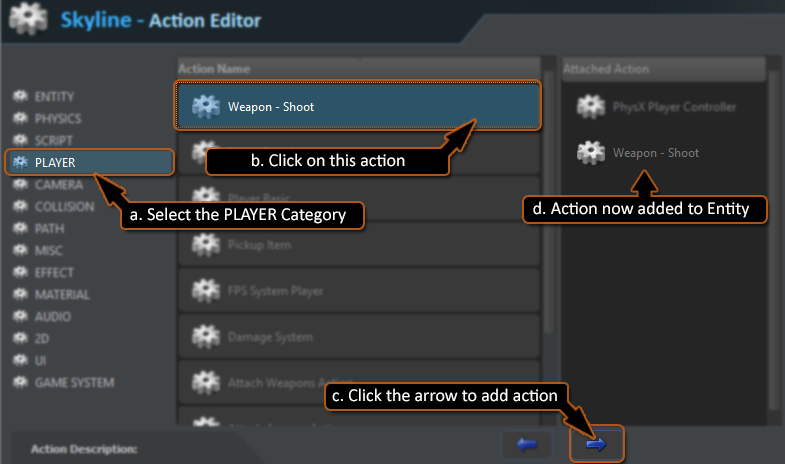
Select your character / cube and open the action editor if it’s not already open.
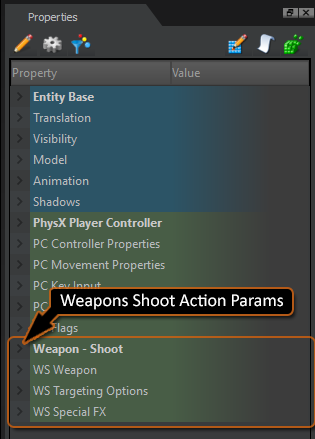
Adding an action will add some extra properties to your entity property list. Most actions have their own properties that get added to the entity as the action is attached. This provides a small amount of customization over the action.
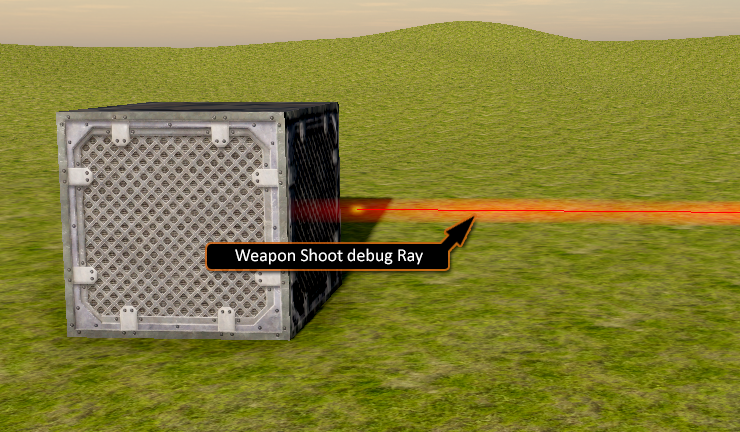
Now we have seen the Weapons – Shoot actions properties, we are going to make a few changes. The first change is to make it easier for us to see where the weapon is shooting. This is visualized by using a debug ray which looks very much like a laser targeting system.
So the ray is not some form of “ultra-weapon” (shame I know!) but a debug ray that will help us when setting up our shooting behavior. Some models face down the Z axis, some face the other way. This debug ray will help in ensuring we shoot the correct direction and shooting from the correct position such as the end of a gun.
b) Check the box “WS Debug Ray” to turn it on.
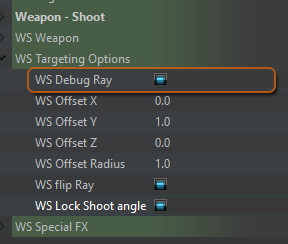
Now if you were to press play you would not see any ray as it is set to shoot from the objects axis and in some cases this will be in the floor or from inside the object itself.
To overcome this we have a few setting that position the start of the shooting ray.
We will need to adjust few setting of the debug ray to enable it to fit in with our model. As mentioned in the last step the starting position and direction of the shooting ray will be different for each model, but it’s easy to setup.
These options will be different depending on the model used. If you are using the cube set the options to the ones for the cube, if using the character use the characters options.
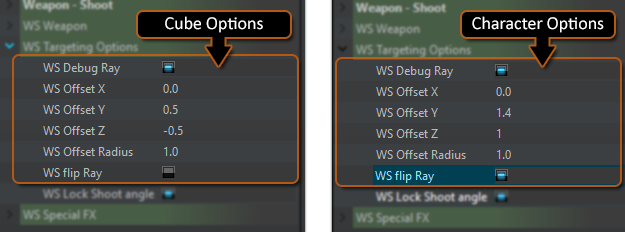
The option “WS Flip Ray” reverses the direction that the ray shoots so if it’s shooting backwards check this option. Also the “WS Lock Shoot angle” property will need to be checked for this tutorial as we want our shooting to stay in the horizontal direction and not use any elevation.
Worth also noting is that the “WS Offset Radius” moves the shooting start point away from the objects axis by 1m (in the current example) in the forward direction.This is regardless of object rotation, good to adjust this value until the shooting is coming from the tip of the gun. As it is the position where any muzzle flash will show.
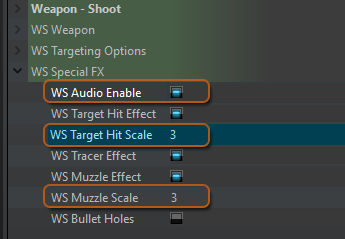
We can make the starting point of our shooting more noticeable by enabling the muzzle flash effect. This will need a couple more settings adjusted, but by now you will be a pro at setting options ;)
b) You may need to resize the muzzle flash and the target hit effect. You can do this from the same effects options. Set the “WS Muzzle Scale” and “WS Target Hit Scale” to the value = 3.
Finally we will need to set up the weapon shoot action to use one of the weapons from the scene. These weapons are designed in the weapons editor and the default scenes have a couple of ready-made weapons to use.
Press play and shoot away.
NOTE: Audio – if you cannot hear the shooting sound you may find you have moved the scene camera to far away from the object. This is due to the audio being positional and having an audible distance, if you move closer then you should hear the sound.
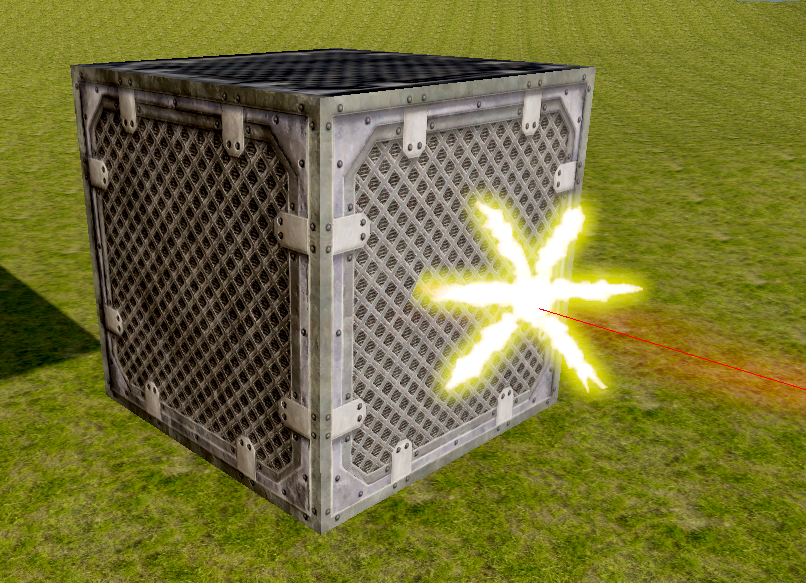
The Keys [WASD] will move the cube and the mouse movement will rotate the cube and you should have something similar to the following image. Oh and to Shoot, use the mouse LMB ;)
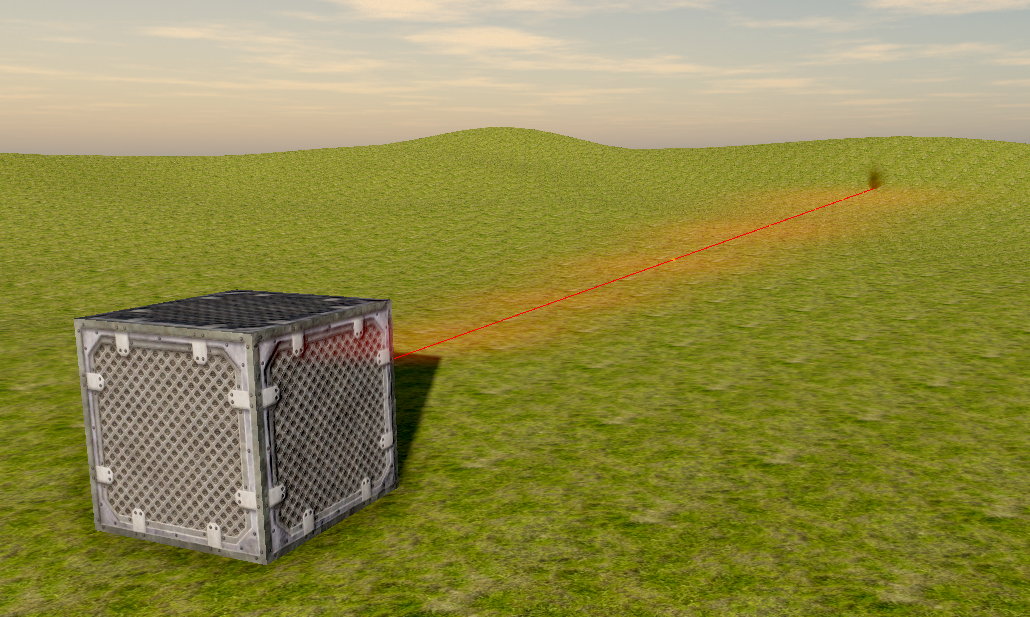
Save your Scene as we could use it in other tutorials.
If you have not tried the Basic Character tutorial, give it a try and then add your new weapons shoot action.
In the next Tutorial we will make something go boom in the topic Simple Health and Damage
