In this short tutorial we will look at the simplest ways to make an object shoot. This is a very basic shooting mechanic but can be used in various ways, such as a basic character or vehicle weapon. There are many ways to expand beyond this action as it can be dynamically controlled via a host of lua commands and Event functions (a Lua function called by the Damage action) there are even a few visual modules that also react to this action, but for this tutorial we will keep it simple.
You have a choice here, either open the basic Character scene you made in the Basic Character Tutorial and move to LINK: Shoot or, continue with this first step…
Ah you have chosen the continue with this first step option. Your character receives 150XP for your bravery!
b) From the main tool bar click on the “House icon” to open the page.
c) Select and double-click LMB on the template: “02 Template Uneven_Ground B”

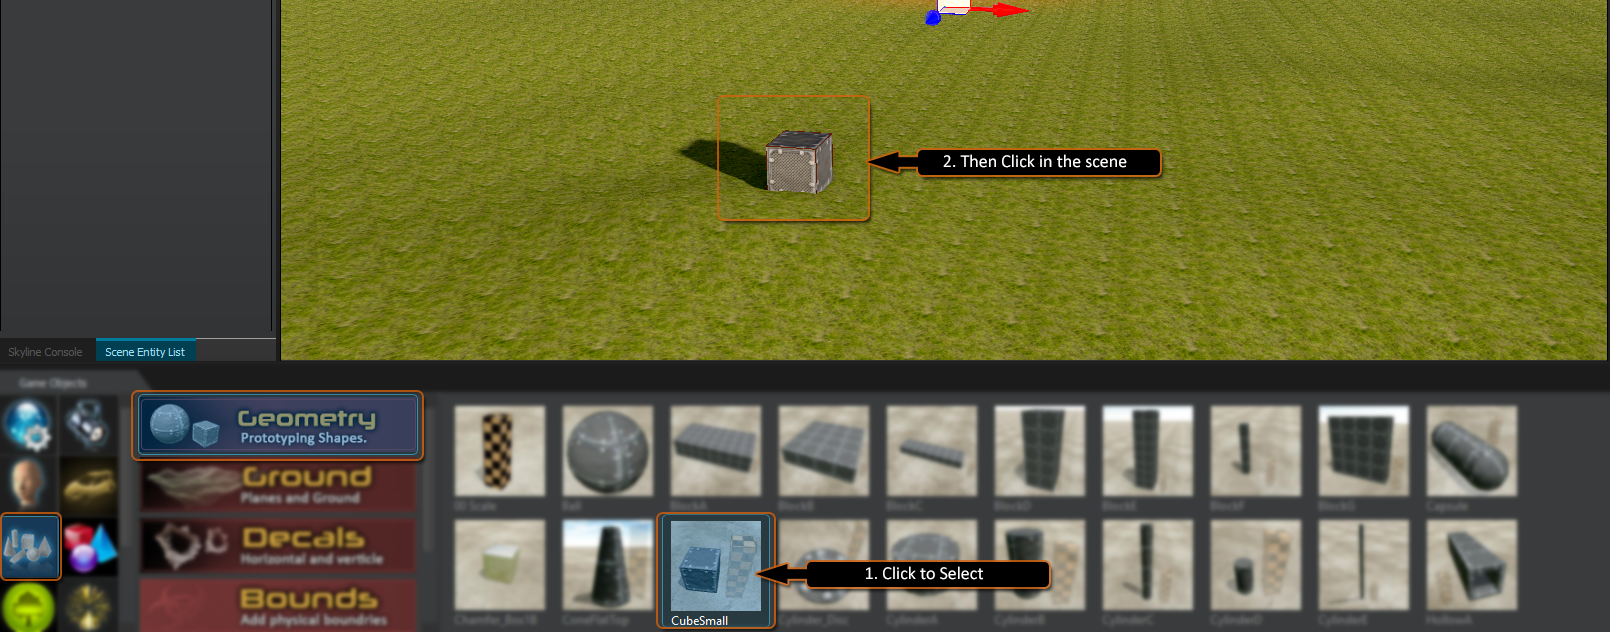
We are going to add a cube to our new scene from the Game Objects panel.
Once selected, the Game Object’s paint mode is activated and a representation of the selected object will show in the scene.
Now when you click in the scene, the Game Objects paint mode will place a copy of this object for you.

b) Click somewhere on the ground to place a new cube please see the following image:
These tabs contain most of the common options for use when developing a scene.
If you cannot see the name there you may need to scroll along the tabs with either the middle mouse wheel or the arrows to the right.


For performance reasons an object that will never move in the game, should be set to static. This object will also be taken into account when using any AI Navigation.
In our tutorial we are going to be moving the cube around, it is therefore classed as “Dynamic” and should have its“Update Mode” set as such.
b) Find the “Update Mode” property and from the drop down select “Dynamic”

An “Action” brings our entity to life. An entity can have many “Actions”. Actions provide various functionality such as, script, game mechanics, and controllers. When these are combined with an entity, your game world can come alive!
When attached “Actions” have their own special properties which get prepended to the entity’s property panel.
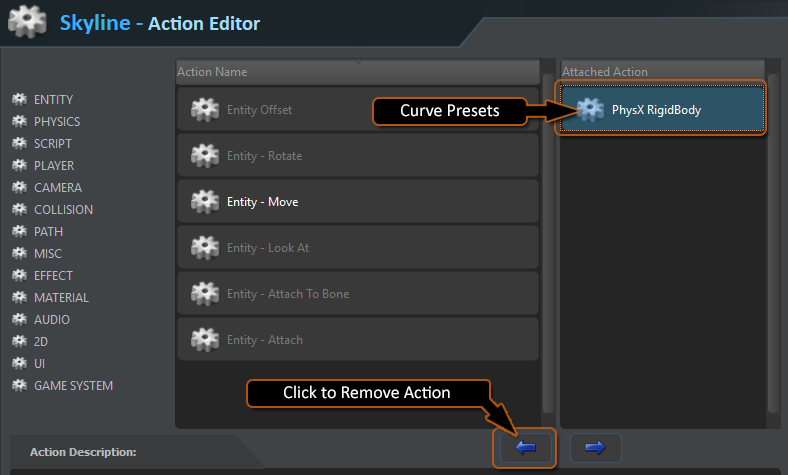
We are going to move our cube, and make it shoot, by using an action.


From the open ”Action editor” select the “PhysX RigidBody” action from the right hand side listand then click the lower left arrow to remove the action from the entity.
b) Find the “Update Mode” property and from the drop down select “Dynamic”
To make the cube move and rotate we need to add a ”Simple Player Controller” action. This controller works straight out of the box. Although not feature packed, this controller requires zero scripting!
A more powerful character controller would need the use of scripts or visual modules but this is outside the scope of this tutorial.
b) Then click on the lower ”right facing arrow” to attach this action to our entity.

That's the end of the first section. Here we have located the property panels, opened the action editor and removed and added an action. These are processes that will become second nature over time.
The ”Play” button is located at the right hand side of the main tool bar.

Key W will move the object forwards in the direction it is facing, this direction is controlled with the mouse.
In the next section we will add the “Shooting Action” and see how to make the simple shooting mechanic. Then go have a well earned coffee … (substitute your favorite beverage)