We have seen how to open the GO panel and how we can add GO Items to the scene. In this chapter we are going to use the previous scene we made and add some atmosphere with the GO Lighting ui.
Also we are going to add some more assets to the scene but this time we will look at how to have control over the random scale of an object by setting a maximum and minimum scale.
For reference I will add a full list of the GO Key Commands at the bottom of this topic.
When we did the rocks it was fine but other objects may not need to be as big, eg a fern would not be the size of a boulder, well generally it wouldn't! We can set a max and min size for the random scaling.
a) Activate the scale mode by pressing key[4]. You can always see what mode is active from the GO ui (top left of scene view)
b) By using the key[ALT + move the mouse left to right] until you have the max size you want. Moving the mouse one way will scale the object larger and move the mouse in the left direction will shrink the object.
c) To fix the max scale to memory press the key[.](>)
d) To set the min size, again use the key combo[ALT + Mouse move to the left]
e) To fix the min scale to memory press the key[,](<)
f) Enable GO grid snap key[5]
If you are wanting to make large changes to scale you can speed up the scaling process by holding down the [SHIFT] key whist scaling.
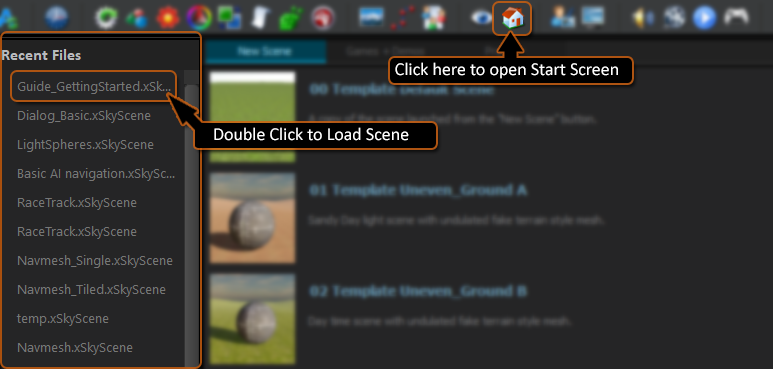
For this exercise we will continue with the Zombie shooter scene we made in the last chapter. Go to the “Start Screen” and on the left hand side of this page there is a column for recent files. Select the scene from the list.
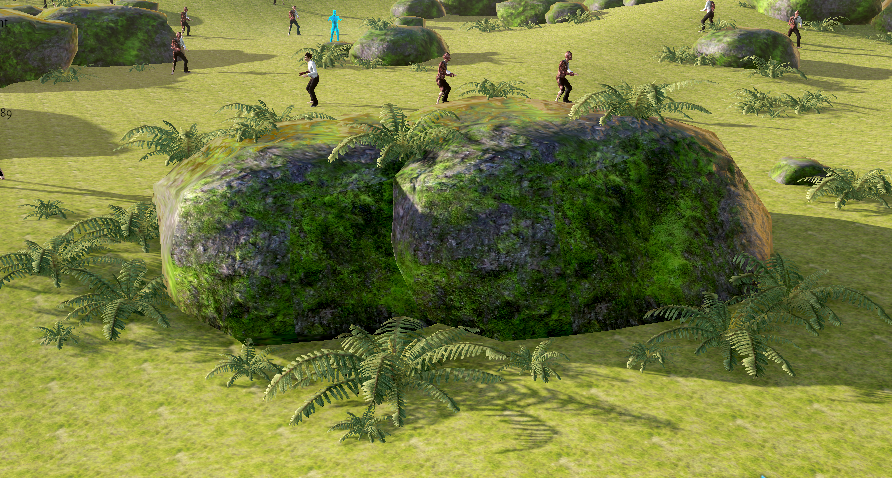
Armed with the knowledge to be able to set max and min scale sizes go ahead and load the GO fern. Set its min and max scale and paint some random plants. Oh! and don't forget to use the Random rotation by pressing the [3] key.
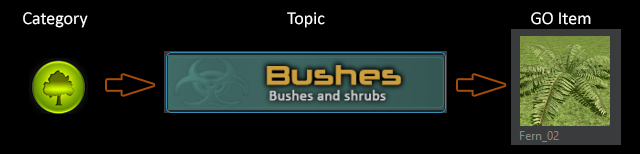
CATEGORY: Nature
TOPIC: Bushes
GO ITEM: Fern_02
Feel free to add other bushes to your scene, have fun placing your assets and at any time just hit [F9] to see what it looks like from the players perspective.
Skyline has some very powerful lighting options but this can be a bit complicated, some times when developing a scene you just want to quickly test some lighting and atmosphere. The GO Panel comes to your rescue with the GO Lighting UI.

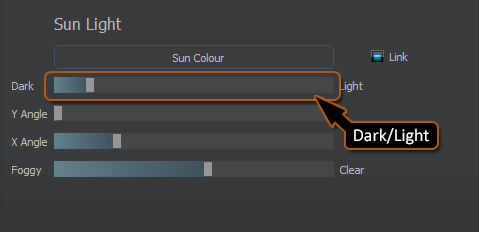
You will notice the sliders “Y Angle” and “X Angle” these adjust the light direction and height, give them a quick move to get a feel of whet they do then return them to there original positions.
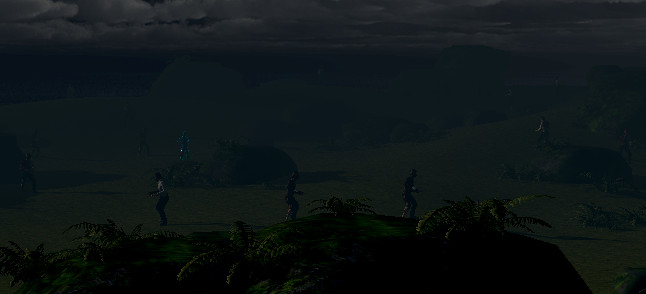
you should have some thing similar to this.
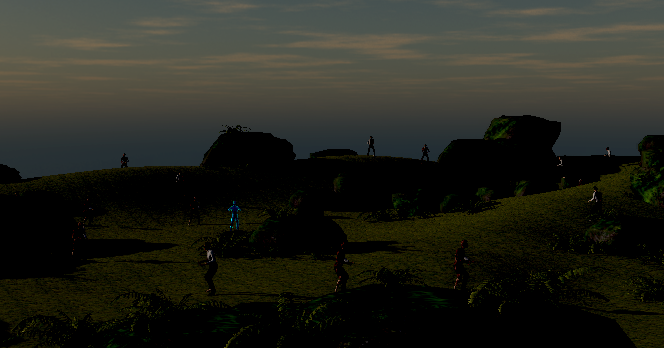
The sky looks wrong for the type of scene, we need something a little more moody. From your GO panel select the Environments and select Skybox, as soon as you click the item your sky should change.
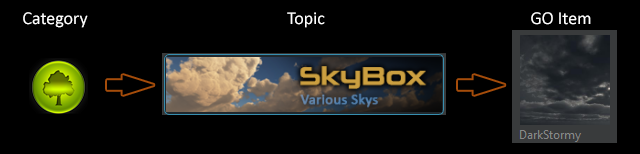
CATEGORY: Nature
TOPIC: Skybox
GO ITEM: DarkStormy
Next we need a bit of fog to add to the atmosphere. To do so move the Fog Slider from the GO Lighting UI, to the left. The further left the more fog will be added to the scene.
The fog brightness is controlled from the Lighting slider, as the lighting gets darker the fog also darkens.
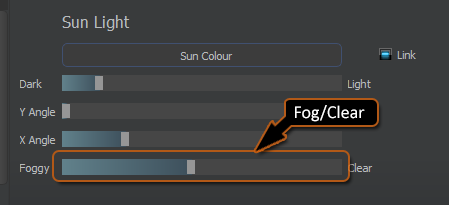
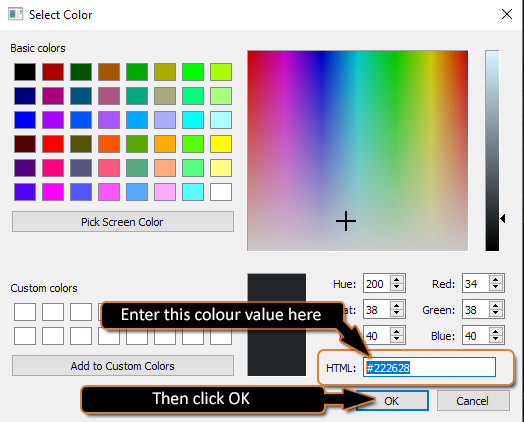
Now for our scene we want the fog to show a little brighter than the lighting slider gives us. Once you are happy with the light level we can change the fog colour. Remember that if you move the light slider again, you will need to reset your fog colour.
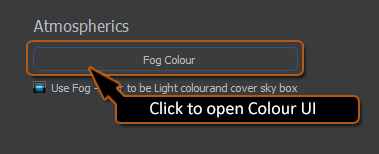
Copy this colour value “#222628” into the colour value as shown in the following image:
Now to be able to see in the game the player will need a torch. This can be found in the GO Lighting category>Spot lights>FPS Torch
Press key[T] to activate the torch.
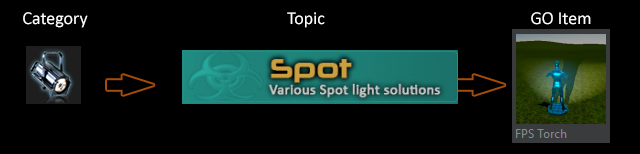
CATEGORY: Lighting
TOPIC: Spot Lights
GO ITEM: FPS Torch
Let see what the scene is looking like now from the players perspective. Press the “Player the Game” button from the tool bar and when the game is running, press Key[T].
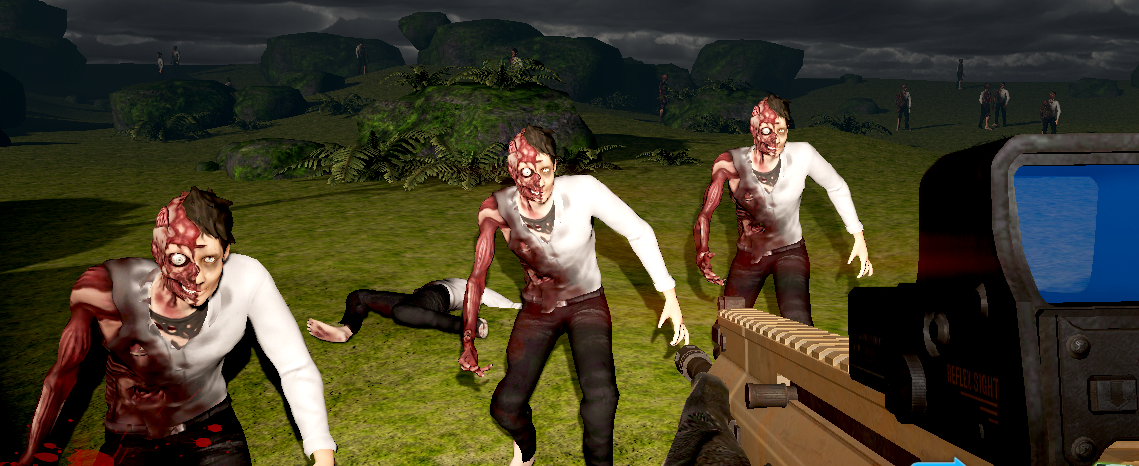
End up as zombie food? well looks like you need some health and some more ammo when playing the game!
These can be added from the GO Mechanics>Pick ups>FPS Health click in the scene where you want your healing points and in the game walk into them to heal.
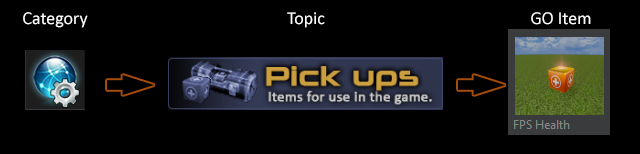
CATEGORY: Mechanics
TOPIC: Pick Ups
GO ITEM: FPS Health
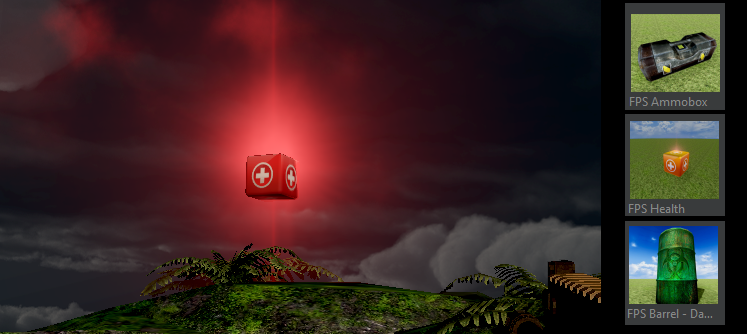
You can also add some Ammo in the same way from Mechanics>Pick ups>FPS Ammobox
and for some explosions add a few of theseMechanics>Pick ups>FPS Barrel
We have explored some of the Game Objects features, there are still many more to look at but we will leave that for another time. Feel free to explore the Game Objects and build your scene.
NOTE: Don't Forget To SAVE
Next we will have a look at how to customize Game Objects to suit your needs.